
Loupedeck CT and Live can operate as a handy tool for working with MIDI notes.
First select a note with your mouse, so that selection-related actions can be used.
TIP! To quickly select all MIDI notes, use the Select All action you can find on Utility page 1.
TIP for CT! To quickly deselect everything, press Fn + Enter (functions as Esc) or press down on any selection dial.
• Change note selection:
Once a note is selected, the Skip ↓↑ dial skips over notes: it changes the selection from one note to another, “browsing” the notes while keeping the selection in one note at a time.
TIP! To browse between notes in the selected key only, use Skip ↔.
• To extend note selection / add more consecutive notes to the selection:
Once a note is selected, the Skip Select ↑↓ dial extends the selection, adding more notes to the selection.
• To select a range between notes:
When a note is not selected, the Skip Select ↔ dial selects a range containing notes, moving from one note to another (starting from where the vertical playhead is).
• To select a range based on grid:
Use Select ↔ dial.
• To change note length:
Use Select ↔ dial once a note (or several) is selected.
• To move note(s) up/down by an octave:
Once a note is selected, Select ↑↓ moves the note up and down by one octave.
• To move selected notes:
Use the ↔ dial, Play/Stop wheel, or CT arrow keys to move them.
• Move between notes:
If a note is not selected, Skip ↓↑ dial “browses” between notes.
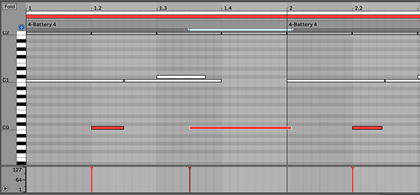
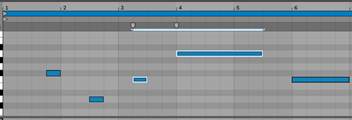
WORKFLOW TIP! Got overlapping bass and kick MIDI notes? Open up the MIDI view for both clips (see pic above): first double-click on one, and then CMD/Ctrl-click on the other to see both. Select one note and use Select ↔ dial to change its length. Without removing the selection, use Skip ↓↑ to move to the next note, and set its desired length once again with Select ↔ dial.
PROTIP for CT: To quickly switch the view to MIDI editing / “piano roll” - place the selector on the clip you want to edit and quickly tap Fn + Save twice. This takes the focus inside of a MIDI clip for editing. It may help to think of this as a “double-click”. To change focus back from clip MIDI note view to track or Session, hold Fn and tap button E twice.
Quantizing MIDI notes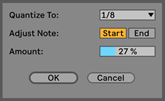 On Utility touch page 1, you will find both Quantize Settings and Quantize. The former sets the parameters for quantization and the latter performs it.
Cropping a MIDI clip
Crop function deletes material that is not inside the current clip loop region. Find Clip Crop action on the Delete functions page.
PROTIP for CT: The last wheel of this workspace is a multi-tool wheel. It contains lots of rotation-based actions such as scrolling, zooming etc. in one list. You choose the tool by swiping up and down and rotate the wheel to do the selected action. This can be a very helpful wheel type, as you can have your most-used actions in one list.
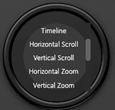
The wheel in this workspace probably has too many actions in one list, but it is there to hopefully trigger some usage thoughts and show you the power it can have. Familiarize yourself with it and customize it to your liking!