
Editing automation is similar to editing clips: select the range and perform desired editing functions. On Arrangement View, as well as inside Session View clips, you can toggle automation view with the automation icon.
Working with automation breakpoints and lines
First enter automation mode by clicking on the automation icon.
On CT: Then swipe the wheel to find the tool with Vertical, Horizontal, and Double Click tool.
Adding breakpoints (only on CT): place your cursor to a desired location on the automation line and use the Double Click tool.
Moving an automation line: To move an automation line (between two breakpoints) horizontally or vertically, place the cursor on the automation line using your mouse so that it is highlighted.
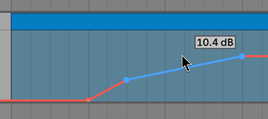
Use the Horizontal mouse wheel tool or dial on CT or the Mouse Drag: Horizontal dial on Live to move the highlighted line left/right and Vertical tool to move the line 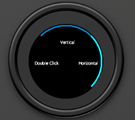 highlighted range up/down.
This is the same as clicking on and holding onto the highlighted automation line and moving it with a mouse. Moving is applied to the region between the first and last breakpoint of the line, which reflects the behavior in Ableton Live 10 software.
TIP! This is handy, for example, for changing the selected region’s Track Volume values. Actual clip gain values can be set, too: see manual section on Clip Parameter Mode.
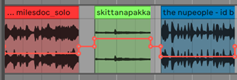
• Moving a highlighted automation region: You can quickly move a whole highlighted automation region left and right with the ←→ dial on Live or use arrow pads, Play/Stop wheel or arrow keys on CT based on the grid (in this way, cursor is not on the automation line; region is highlighted).
• Moving breakpoints: Place your cursor on a breakpoint and use Horizontal and Vertical dials or CT Wheel as described above with moving automation lines.
• Stretching automation: Highlight an automation region. Then place the cursor on a square icon you see on left and right sides of the automation range. Use Horizontal dial tool or wheel on CT or Mouse Drag: Vertical dial tool on Live to stretch the automation as you wish.
• Applying a tilt to automation: Highlight an automation region. Place the cursor on any square icon you see on the corners of the automation range. Use Vertical wheel or dial on CT or Mouse Drag: Vertical dial tool on Live to apply an upwards or downwards tilt to automation.