Due to the way this dedicated mode has been built, this dynamic workspace is not customizable.
Clip grid / Clips on pads
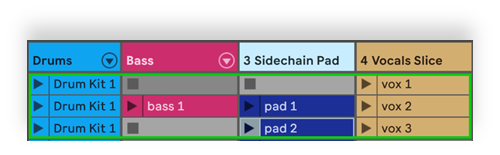
Upon entering this mode, you are taken to Session View. You will see a 4x3 grid (or less wide if you have fewer than 4 tracks) appears on Session View in this mode. This grid corresponds to the 4x3 on the Loupedeck CT/Live pad layout.
Moving the grid
In Loupedeck CT:
To move the grid, use the wheel tool of this workspace: slide your finger on the wheel in different directions, and the clip grid will follow. The CT pads will automatically update to show the names of the clips that are inside the clip grid.
In Loupedeck Live:
To move the grid, use the dials on dial page 1: one dial will move the grid vertically and the other
horizontally. The Live pads will automatically update to show the names of the clips that are inside the clip grid.
NOTE: On dial page 3, you will see Toggle Clip Grid dial. Push it to hide this clip grid when it’s not needed (e.g., when using other workspaces).
Playing / stopping clips
Triggering a clip is as easy as tapping on its name on the touch pad.
If a clip is not playing when it is triggered, it will start playing.
If a clip is already playing when it is triggered, it will stop.
On dial page 3, you will find Stop All Clips.
Selecting and triggering a scene
In Loupedeck CT:
The wheel has a scene select rotation function: rotating the wheel selects the scene and displays the selected scene on the wheel. Touching the wheel (without movement) triggers the scene.
If another scene is selected and wheel is touched, another selected scene is triggered.
Touching the wheel while the scene that is playing is selected, the playing scene is stopped.
In Loupedeck Live:
Use the top right Select Scene dial to select a scene AND play/stop it: pushing down on the dial triggers a scene, and pressing again on the same scene stops it.
Selecting a track in Loupedeck CT
The CT Wheel has also a Select Track action: hold Fn + rotate the wheel to select a track. This is handy with the Mute Track dial, for example.
Dial Pages - Press and Rotate Actions
Play/Stop song
To start and stop the song, use this dial. Note that this is a press function.
Mute
Mute can be used to mute a track or a clip. What is muted depends on what is selected: if track header is selected, track is muted, but if a clip is selected, it mutes the selected clip. Use the CT arrow keys or your mouse to change the selection.
Mute track
Mute track always mutes a track regardless of where your selection is.
Select Scene
Use the top right Select Scene dial to select a scene AND play/stop it: pushing down on the dial triggers a scene, and pressing again on the same scene stops it.
Crossfader
For doing A/B crossfading for your tracks in Session View, there is a dial control for crossfader.
TIP: Pushing down on this dial resets the crossfader to default state, i.e., the middle. This is how all dials controls work: pushing resets to default.
Global quantization
As quantization plays a big role in triggering scenes, global quantization is conveniently set with a dial in this workspace. To disable global quantization, rotate the dial counter-clockwise until “None” is set as quantization value.
Delete clip
It is easy to delete clips in this mode by pushing down on this dial.
Delete scene
This push dial deletes scenes. You don’t have to move the selection all the way to the scenes row: scene deletion is based on what scene/row your highlighted clip is on.
Create scene
This push action creates a new scene below your currently selected scene.
You don’t have to move the selection all the way to the scenes row: scene insertion is based on what scene/row your highlighted clip is on.
Capture and insert scene
This action makes a new scene out of all clips that are playing when the action is triggered.
The new scene is created below the current scene selection (see above for the insertion rule).
This is very handy for being creative: when you use Session View as a sketchpad to jam and play clips here and there, it is convenient to create a new scene out of all currently playing scenes that “makes sense” and captures your current idea/loop/theme.
Duplicate
This push action can be used to both duplicate clips and scenes – based on where your selection is. If a clip is highlighted, a new duplicate clip will be created below it. If a scene is highlighted, a new duplicate scene will be created below it.
TIP: You can use the Loupedeck CT arrow keys or your mouse to move the highlighted area to scene selection if it is on clips.
Stop all clips
On dial page 3, you will find Stop All Clips: this is a press function of the dial.