Opening the Icon Editor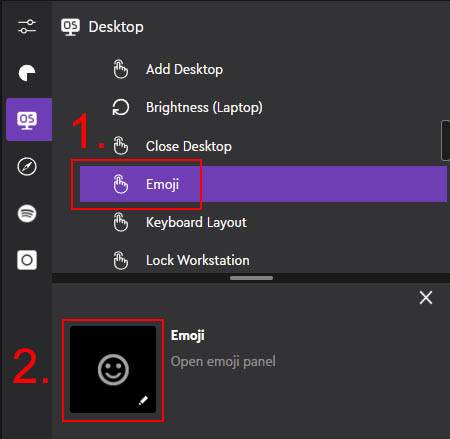
You can personalize your Loupedeck experience with your own icons or use ready-made icons from the icon library.
- Click on the action you want to update with your own icon. This opens the action editor to the lower part of the action panel (2).
- Click on the icon-area of your selected action
- Icon editor opens in the middle of the Loupedeck software.

Icon Editor Preview
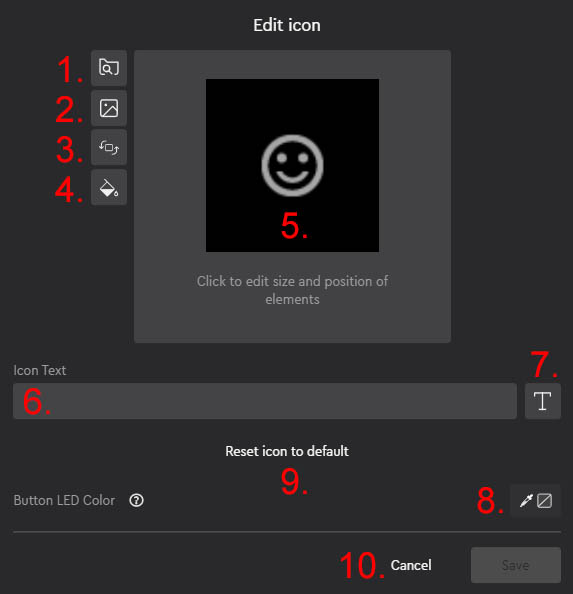 Browse files from hard drive
- Open Icon Library (to pick a stored icon)
- Rotate icon image left or right
- Select background color
- Reposition icon image or icon text
- Write a title for the action (text appears on icon area)
- Change font, or adjust font size and color
- Select color used in illuminated buttons (e.g., round buttons in Loupedeck Live S, Live and CT)
- Reset icon back to original state
- Cancel the icon or Save changes.
With the added gif-support provided by the 5.1 software update, you can also personalize your screen by using animated gif - icons.
Icon Libary
The default icon library includes selected Loupedeck icons. Additional sampler packs by iConCity, SideShowFX and other icon providers can be installed through the Loupedeck Marketplace or installed from a file. You can install and uninstall icon packs through the Assets Manager.
- Select your preferred icon pack
- Select your preferred icon
- Press Save and you will return to the icon editor (and selected icon is in use)
![]()
An added icon or gif can be deleted from the icon editor. You can also add icons or gifs to any action.
Note: The standard icon size is 80x80 pixels