How to import and export profiles
In Loupedeck software you can import or export your profiles one-by-one.
How to import
- Download profile
You can find and download all our available custom profiles from here. - Import profile
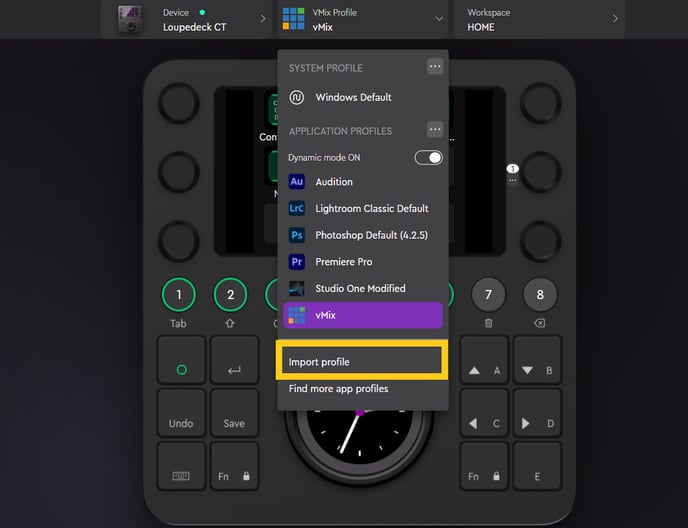
You can find the profile import function at the bottom of the profile drop down menu (lined with yellow color in the picture below).
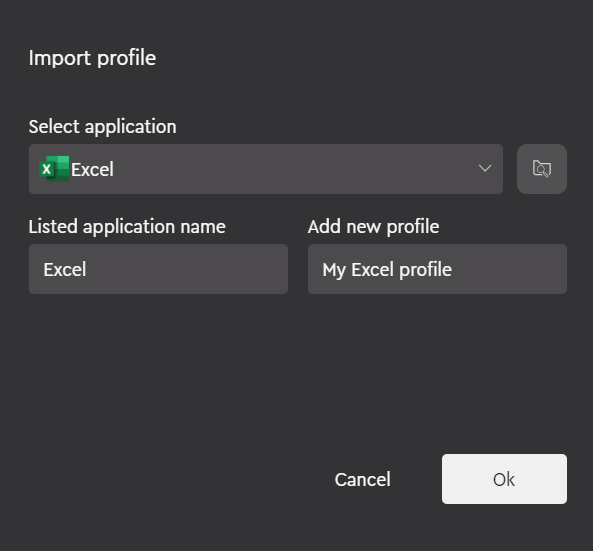
Pressing Import Profile will open a folder management window, where you can choose the profile you wish to import. The system should automatically recognize the software it is used with. - Link imported custom profile with a target application
This step is only required if you don't have the application you're aiming to use your Loupedeck with listed in the application dropdown list.

- Make sure the preselected application in the dropdown list is the correct one. If you have several versions of the target application installed you might need to browse manually to the executable file that starts the target application. You can browse there by clicking the folder icon next to the application dropdown.
- Alter the application name and the profile name if needed
- Hit Ok
Tip! Loupedeck system allows the same profile to work in both Windows and macOS if the shortcuts, actions and adjustments can be found identically from both OS versions (Keyboard modifiers are changed as following: Alt -> Opt, and Control -> Command).
Note! After importing the profile some custom actions may not work if your target application's shortcut list is altered or otherwise is not similar as the one used when the profile was created.
How to export

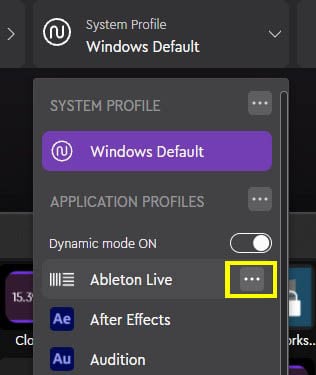
To export a profile, go to the Profile dropdown menu and choose the three dots next to the application of which profile you wish to export. This action will open a window like in the picture below.

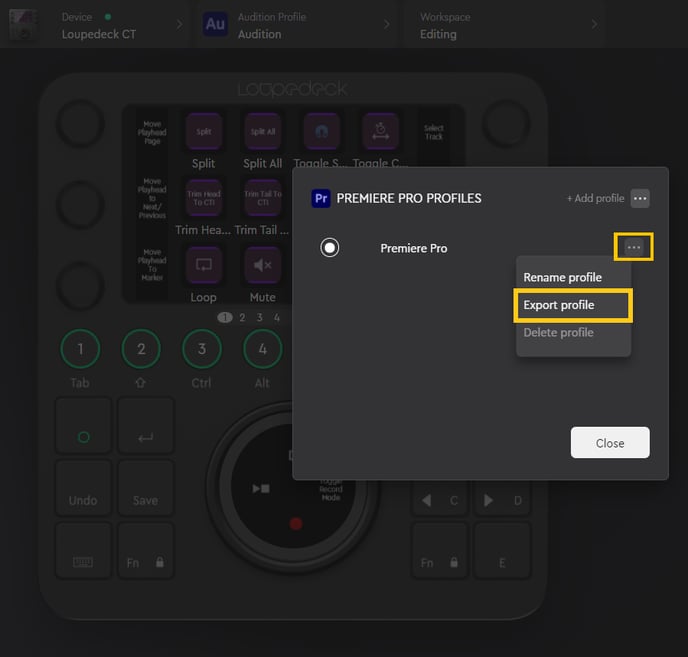
Then press the three dots on the right side of the profile you wish to export and choose Export profile from the dropdown menu that is presented.
Now you can choose the location where the exported profile is saved. Name the profile and press export to finish the process.