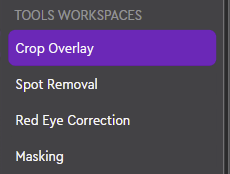
How to make changes to a specific tool for Lightroom Classic
Lightroom Classic has fou r main tools which are also available for Loupedeck devices:
- Cropping
- Spot Removal
- Red-Eye Removal (including Pet-Eye function), and
- Masking
 Each of these tools have a designated workspace (called "Tool Workspaces") which can be edited:
- Open the Workspace drop-down menu
- Scroll down to see the title "Tools Workspaces"
- Select the tool workspace you want to edit
After the tool workspace has been selected, the action panel automatically updates the list of available actions - to include the actions related to the selected tool (and to hide actions that are not possible to use when the selected tool is active).
Selecting actions for the tools
Next step is to find the related actions from the action panel. For this search is a powerfull tool. If you want to see what actions each tool workspace can utilize - you can select corresponding action/adjustment folders manually and pick what you need:
Crop related action groups:
- Crop: All actions to control the crop tool
- Note:Crop group is visible for all workspaces (includes only "reset crop" action)
- Crop Aspect Ratio: Includes actions for the shape of the crop area
Spot Removal related action groups:
- Spot Removal
Red-eye tool related action groups:
- Red-Eye Correction
Masking related action groups:
- Brush: Actions related to Brush masking tool
- Localized Adjustments: Adjustments for adjusting the "local image area" which is limited by the mask (adjustments for adjusting the whole image, not the mask, are called "global adjustments").
- Masking: All masking actions and masking tools, e.g., brush, gradients, sky, subject
Note! As Lightroom Classic introduced new masking feature, combining the old "local area tools", there are no longer separate workspaces for separate tools - all the masking tools are now included in the masking workspace (so only one workspace needs to be set up - instead of several).