Crafting the perfect profile might take some time - but good things come to those who make an effort! You can easily assign MIDI CC and Notes for action shortcuts in vMix.
Here's how!
First, make sure to add your Loupedeck Live or CT as a MIDI controller in the vMix Shortcut settings. (See picture 1)
vMix: Settings -> Shortcuts -> MIDI Settings -> Choose your Loupedeck device as the MIDI device in use by checking the box next to it.
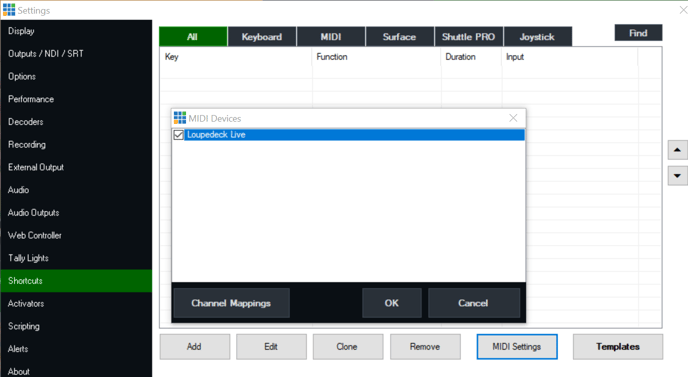
Picture 1
After adding Loupedeck as a MIDI device, you are able to start creating and assigning MIDI commands in vMix. You can either use and modify the presets in the MIDI Workspace of vMix default profile or start from scratch and create your own from the beginning.
In case you want to go through the whole creating process yourself, please click here to learn how to use the Loupedeck MIDI plugin. In this manual we will guide you through the process using the MIDI workspace presets.
How to add MIDI Shortcuts using the MIDI template in the default vMix Profile
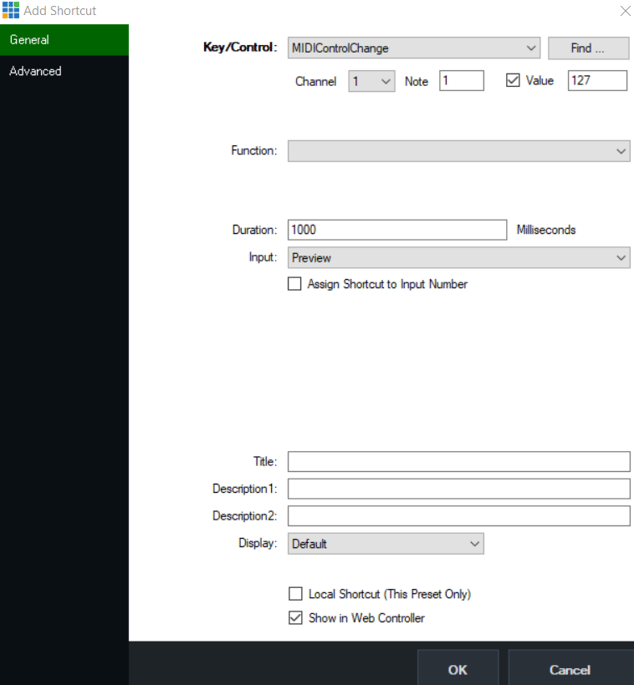
Go to: vMix Settings -> Shortcuts -> MIDI
Press: Add (shortcut) on the lower left corner.
Choose MIDI Control Change (or alternatively MIDI note on/off can be used as commands as well) from the Key/Control dropdown menu.
Next you can either pair the MIDI CC action by pressing the "Find.." on the right side of the dropdown menu and then assigning the MIDI CC action by pressing it on the Loupedeck device.
Picture 2
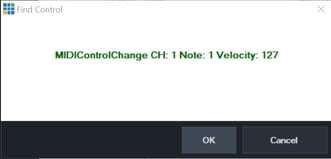
When you see a message like in the picture 3, vMix has found the device and the action. Press OK.
If you choose to do the pairing manually, note that the MIDI channel is set to 1 in the MIDI template and the default value is set to 127. Put the corresponding MIDI Control Change number to the "Note" section of the MIDI CC options.
Picture 3
Next step is to choose from the dropdown menu which function you want this MIDI CC action to execute. Remember to once again press OK to finalize the process. You can repeat this as many times as needed.