Photoshop default profile (CT)
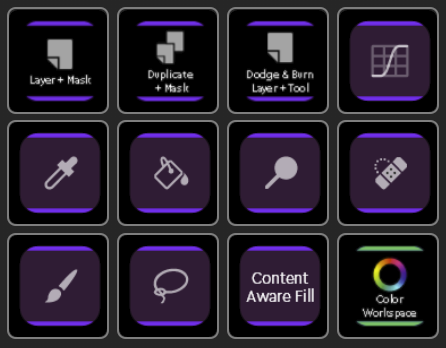
Photoshop's default profile is an avarage collection of everyday tools separated into two touch pages - this means that you might need to a) reorder assigned actions (to get priority tools on the first page), or b) change some actions to better suit your personal needs (e.g. perhaps changing spot healing brush tool for clone stamp tool).
Loupedeck's Photoshop profile is made to be as simple and fast to use as possible. This means that the main functions are directly accessible from the round and square buttons and the amount of workspaces has been kept minimum.
Dials
(Almost) throughout the default profile dials have one main purpose: to adjust tool's or layer's main parameters:
Left bank (tool parameters):
- Size (tool): Tool's tip size (e.g. brush tip size)
- Opac. (tool): Tool's opactiy
- Hardn. (tool): Tool's hardness
Right bank (layer parameters):
- Layer Scale: Adjust the size of the layer's content
- Layer Rotate: Rotate the layer
- Opac. (layer): Adjust the opacity of the layer
Main Tools (workspace)
 Button: Home Button
Whenever Photoshop starts you will see this workspace and the most used tools - ready to be used.
Idea is that the first page has the most common tools, Custom Macros, adjustment layers and link to the Color Workspace.
The second page contains less used actions, macros and adjustment layers.
Wheel ring is assigned with Zoom in/out. Wheel screen has two actions assigned:
- Swap between current and previous tool, and
- Fit image on screen
 Color Workspace
This workspace is not assigned to any of the physical buttons, instead can be found as a link from the Main Tools workspace.
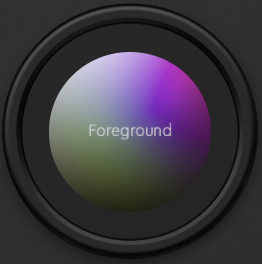
Color workspace is divided into two touch pages, one for foreground colors and one for background colors. When changing the page between foreground and background, also the wheel changes accordingly.
Wheel contains a HSB color picker.
Layer Properties (workspace)
Button: Round Button 1
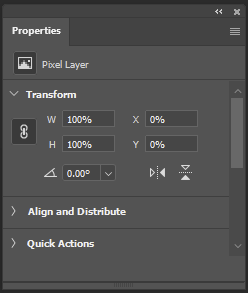
 This workspace adapts to the Photoshop's Properties Panel and reflects it's content to the Loupedeck device - when activated, it can be identified from the Layer Properties Commands sign at the top right corner of the touch screen.
 All the Layer Properties panel's adjustments are converted as dials and all the buttons, tick boxes (or similar) are converted as touch buttons.
If Layer properties panel has more actions or adjustments that can be fitted on one page, multiple pages are created automatically.
Layer Properties workspace has pre-assigned actions on the bottom row of the touch screen. These actions are commonly used when working with any layers:
- Brush (Black and white colors for mask work)
- Fill with black (usually used for filling mask with black)
- Gradient tool (usually for making partial mask)
- Invert (inverting areas and masks)
Note! Tool parameters (which are normally assigned to dials) are located on the wheel. Layer parameters are not present in this workspace unless they are part of the Layer Properties panel's content.
Round and Square Buttons
Round buttons are assigned to support most used functions which are needed all the time. Buttons 6 and 7 are paired with related functions on the FN-level.
First round button is assigned with Layer Properties (dynamic) workspace which reflexts content from Photoshop's Properties panel.
- Layer Properties (Dynamic) workspace
- Shift
- Control / Cmd
- Alt / Opt
- -
- Space (activates Hand Tool when pressed down)
- FN+6: Move Tool
- Deselect
- FN+7: Invert
- Delete
Square Buttons
Square Buttons contain two levels of actions which are logically paired (e.g. Navigate Layer List Upwards and Move Layer Upwards). The second level can be accessed by keeping FN-button pressed down.
- UNDO: Undo (Ctrl+Z),
- SAVE: Save... (menu command)
- A (arrow up): Navigate Layer List Upwards
- B (arrow down): Navigate Layer List Downwards
- C (arrow left): Layer Visibility On/Off
- D (arrow right): Toggle between layer or layer mask
- E: Swap between previous and current tool
FN-level actions:
- FN+UNDO: Redo (Shift+Ctrl+Z)
- FN+SAVE: Save As... (menu command)
- A (arrow up): Move Layer Upwards
- B (arrow down): Move Layer Downwards
- C (arrow left): Hide all except current layer (toggle)
- D (arrow right): Create a white layer mask
- E: Swap between foreground and background color